Quantcast
Channel: Tailgating Archives - Kelli's Kitchen

Fruit and Vegetable Train with Halfway Homemade Salsa

$
0
0
Fruit and Vegetable Train with Halfway Homemade Salsa

It’s the Fruit and Veggie Train!

It’s that time of year again to share with you about #Produceforkids who I partnered with to share these recipes I developed myself with a little help from the host of the campaign, Homeland, to benefit the Oklahoma Regional Food Bank. 

Fruit and vegetable Train and Halfway Homemade Salsa

The campaign runs from May 31 through June 30, 2016.  If you purchase any of the following products from Homeland during the month of June, proceeds will go to the ORFB who serve children and adults in need through disbursement of food products donated and purchased. I have worked with Rodney Biven, who has run the ORFB for years.   He is an outstanding leader of impeccable character so I always feel safe giving my money and time to his organization.  Go to this FaceBook page to learn more.

Fruit and Vegetable Train with Halfway Homemade Salsa

Thanks to our sponsor – Homeland and the following great produce companies

The list of sponsors is:


Fruit and vegetable Train and Halfway Homemade Salsa

***I was provided a $50 Visa GiftCard in order to purchase these and other items used in this post****

I used all these and several other produce items, all purchased at Homeland in preparation for this post.

Produce for Kids® is dedicated to educating families on the benefits of healthy eating, providing simple meal solutions and raising money for children’s non-profit organizations. In the 14 years since its inception, Produce for Kids, through its produce and grocery retail partners, has donated more than $5.7 million to children’s charities nationwide.

Created in 2002 by Shuman Produce Inc., a leading grower and shipper of Vidalia® sweet onions, Produce for Kids® is a philanthropically based organization that brings the produce industry together to educate consumers about healthy eating with fresh produce and raises funds for local children’s non-profit organizations. In 2015, Produce for Kids announced that its primary children’s charity would be Feeding America. Produce for Kids runs several campaigns each year and all funds raised stay local.

These in-store campaigns combine advertising, in-store display materials, public relations and online/social media marketing to reach families. Seventeen supermarket banners representing more than 3,000 grocery stores and fresh markets in 33 states and the District of Columbia support the Produce for Kids spring campaign. More than 50 fruit and vegetable growers sponsor the program, representing every major category in the fresh produce department.

Follow Produce for Kids on Pinterest

Follow Produce for Kids on Face Book  

Follow Produce for Kids on Twitter

Follow Produce for Kids on Instagram


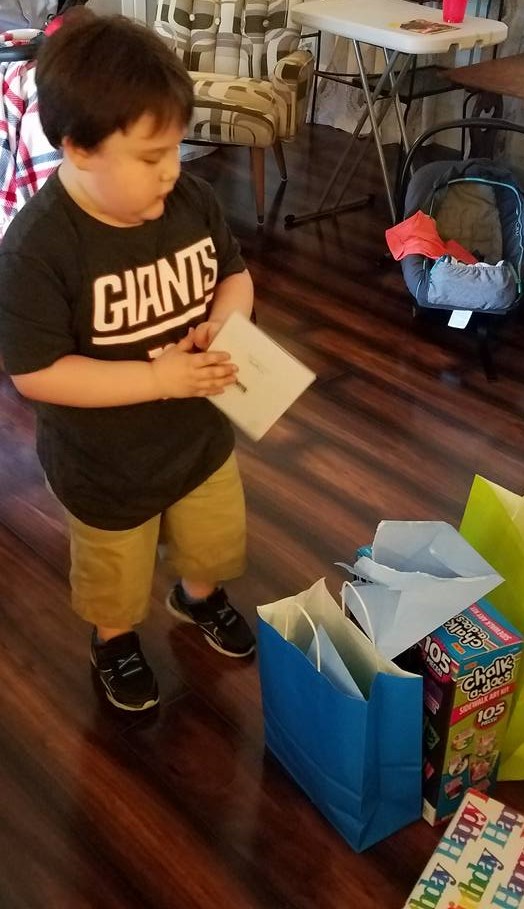
Now let’s make those great recipes!  For this post, my sous chef will be Rocket.

Fruit and Vegetable Train with Halfway Homemade Salsa

Rocket my Sous Chef

Ingredients:

5 Avocados from Mexico, Mexican Hass Avocados

1 bag Delano Farms Company Table Grapes

1 head Green Giant Fresh Iceberg Lettuce

1 bag RealSweet Vidalia Onions

1 bag Victory Garden Sweet Grape Tomatoes

4-6 colored sweet Peppers

1 Cucumber

1 bag Baby Carrots

1 lime

Toothpicks

1 Jar salsa – any kind, does not matter


Directions:

Wash all the fruits and vegetables, let them dry.

Cut all the peppers like this and clean out the insides of seeds and veins.

Fruit and Vegetable Train with Halfway Homemade Salsa

Cut the top off horizontally

Slice the cucumber into round circles and cut up several baby carrots into four pieces each for “hubcap”.

Break each toothpick in half – push through pepper then add the cucumber circle and carrot piece.

Cut up the tops of the sweet peppers julienne – your sous chef can help:

Fruit and Vegetable Train with Halfway Homemade Salsa

Rocket loves to help me in the kitchen – that’s a play knife he’s using.

Fill the insides of each pepper with various fruits and vegetables.

Using the largest platter you have, cover with lettuce leaves and rings of onions.

Set pepper “train cars” on top of lettuce and onion rings.

Finely chop a few slices of onions, several grape tomatoes, mash up the avocados then add them together with a few squeezes of lime and salt and pepper to taste.

Spoon into one of the pepper train cars squeeze more lime on top.

Open jar of salsa and pour into bowl.

Finely chop leftover onion rings, grape tomatoes and sweet pepper to mix into salsa and you have fresh restaurant-like salsa.

Fruit and Vegetable Train with Halfway Homemade Salsa

Get fresh homemade salsa at home with half way homemade!

The kids and adults alike loved eating the train car content, the cars themselves, the tracks as well as dipping the lettuce into both salsa and guacamole even though some of used traditional chips.

Even with the little one helping, it all took about 30 minutes with little muss and fuss.  It was a real crowd pleaser and I think it will be for your next party too!

Fruit and Vegetable Train with Halfway Homemade Salsa

Rocket insisted that I show his “salad” that I let him make along with the train. It’s in the pedestal glass bowl closest to him.


The post Fruit and Vegetable Train with Halfway Homemade Salsa appeared first on Kelli's Kitchen.


Copycat Publix Pasta Salad

$
0
0


Copycat Publix Pasta Salad


Have you  ever visited Fave  Southern Recipes?  They promote many of my posts and I am sure they are going to love this one!  Go on over and give them a looksey – you’ll love ’em  as much as I do!

A few weeks ago I received an email from one of my great followers on my Face Book Page.  Her name is Jill and she asked if I had the recipe for Publix Pasta Salad – she said her and her husband just loved it, especially with chicken and corn on the cob but it was so expensive she hoped to be able to make it cheaper at home for a family picnic she had coming up on Memorial Day.  I had to tell Jill we didn’t have Publix grocery stores in Oklahoma but I would try my best to find the recipe and I suggested that maybe she make friends with one of the deli workers at her local Publix.  Since they make it at each store, surely they would share the recipe.

I found a recipe from someone who posted on the Internet that she had made the salad at a Publix but Jill said it didn’t quite sound right.  She made friends with a deli work and sure enough, she shared the recipe with her which Jill shared with me and today I am sharing with you – it is so doggone good and perfect for a picnic that needs a shelf stable dressing (no mayo in this!) and nearly everyone in the family scarfed it down like there was no tomorrow!  I will be making it again and again – and you will too!

Today is my husband’s birthday and tomorrow is our 11th anniversary so this week will be very busy with eating out and going on adventures etc….  Having this salad in the fridge for me to eat in between is perfect!

Ingredients:

1 lb. bag of small shell pasta

Drizzle of Olive Oil (I did this myself – not in original recipe)

15 ounce jar of Artichoke Hearts, drained and roughly  chopped

12 ounce bag of frozen spinach, thawed and water squeezed completely out

1 cup sliced Kalamata Olives, drained

1 to 2 Cups bottled Caesar Dressing –  however much is to your taste

Salt and Pepper to taste

***I added some finely chopped red sweet peppers and a sprinkling of shredded Parmesan cheese just to make it look pretty***


Directions:

Prepare small shell pasta according to package directions, drain and then drizzle with a bit of olive oil.

Add everything else in a large bowl with pasta and mix well.

Refrigerate for at least 3 hours – it’s perfect to make the night before.

Take to your party and don’t worry about re-refrigeration!

Copycat Publix Pasta Salad

Enjoy!  How easy was  that?  It’s really important to  allow it to chill for a couple hours so the flavors can meld together.

The post Copycat Publix Pasta Salad appeared first on Kelli's Kitchen.

Chocolate Sheet Cake

$
0
0


Chocolate Sheet Cake

Chocolate Sheet Cake

Below is my very best go-to chocolate cake recipe.  Chocolate Sheet Cake.  It is the recipe that my childhood best friend’s mom made all the time.  I loved that cake.  First, let me tell you what got me thinking about posting this recipe.

Do you remember trick or treating?  I do and it was long before people got upset about sugar intake or that somehow dressing up in costumes and getting free candy from the neighbors was fortifying some sort of devil worship?  Remember going with your best friends?  My childhood best friend’s name was Lisa.  She lived kitty corner across the street from me from the time I was 5 years old.  She was one year older than me and had an older brother and sister.  Ray and Darla.

Lisa taught me a lot about many things including what it was like to have siblings.  I am an only child and had no idea.  It was always odd to me how they could yell and scream and wrestle and hit each other with great relish but boy you better not pick on one of them because the other two would come to their rescue and you would have a war on your hands!

Lisa was the coolest person I knew.  She had a 10-speed bike.  I did not.  She could wear a 2 piece bathing suit to the pool and look like those girls in the magazines.  I did not – I looked like the boys in the magazines.  She could play softball — second only to her sister Darla who was the best batter and catcher-of-the-ball I ever saw.  I wasn’t coordinated enough.  Lisa got to wear her hair the way she wanted……..parted straight down the middle.  I could not.  She tanned as dark as a biscuit and while I tanned too, it just didn’t look as pretty under my dark brown hair – unlike her sparkly blonde tresses.  Lisa still loves going on cruises and sitting by the pool – I haven’t been near water in ages.

Lisa’s mom made every meal from scratch.  My mom worked – had a college degree and a career so I was more accustomed to TV Dinners and pre-packaged meals during the week although we had cattle either out back or we rented pasture land from family friends so we had grass fed beef and pork my entire life.  Mom wasn’t much of a cook – not like my nana – so she cooked the meat until it was just this side of burned and called it good.

Lisa’s mom not only cooked everything well she was cool too.  She always had soft curls, beautifully filed pointy nails and smoked long cigarettes that she would draw in deep and talk to mom as the smoke escaped her lips in one long exhale.  She was trim and wore these flowered shorts and white tank top – the uniform of a gorgeous woman who nobody messed with………..you know that woman from the neighborhood.  No one wanted you to tell Lisa’s mom because she would come take care of any misbehaving you were doing by herself, blindfolded and with one hand tied behind her back.  I found out later from the few boys in the neighborhood they thought my mom was the beauty of the block but they felt safest around Lisa’s mom!

One of my favorite memories is the very last year Lisa and I went trick or treating.  We both dressed up in our dad’s clothes like Hobos and then we ran all over the neighborhood adjacent to ours talking to friends, giggling and gathering up as much candy as we could.  We got home way after dark but no one worried.  There was no reason to.  I’m sure Ray and Darla were out there in the shawdows somewhere – begrudglingly watching out for us.   In our neighborhood was even a house where there was a bowlful of candy on the front porch and the family was gone.  A note said to take just one or two and we did.  There was no reason not to follow the rules because someone would tell and then we would be in trouble.  Everyone knew everyone and even if they didn’t – parents looked out for each other as did the kids!  My husband’s favorite place to trick or treat was an older couple’s house where she made really tasty caramel apples – doesn’t that sound delicious right now?  What about a hayride and weenie roast?  Fun times, weren’t they?

Lisa and I lost touch when I moved out of my hometown but with the birth of face book, rediscovered our friendship.  Eventually, I asked her for her mom’s cake recipe.  From the very first time I made it, this cake is a family favorite.  We keep it in the fridge and eat it all the time.  My daughter requests this cake more than anything else I make and I don’t mind.  It takes me back in time to a place where all I had to do was get my homework done, chores accomplished and stay out from between Lisa and Darla when they got into it!

Chocolate Sheet Cake

My daughter and her husband will take my grandson trick or treating this year – and these are the costumes.  Extra points for knowing who/what they are! Leave your answers in the comments below.

**My daughter and grandson will be helping out more at KellisKitchen.org. Look for them more in posts to come.

I hope you enjoy this cake as much as my family does.  As you can see by the photos, it’s still hot some days here so we had to take the photos fast as the icing/frosting was melting.

Chocolate Sheet Cake

Sift together:

2 Cups Flour

2 Cups Sugar

½ teaspoon salt

1 teaspoon baking soda

Boil and Cool:
2 sticks of butter

1 Cup water

4 Tablespoon Cocoa

Pour sifted ingredients into boiled ingredients

Add 2 eggs beaten

1/2 Cup buttermilk

1 teaspoon vanilla.


Mix well

pour into greased and floured cookie sheet pan

bake at 350 for 20 min.

Icing
6 Tablespoons Milk

6 Tablespoons Butter

6 Tablespoons Sugar

6 Tablespoons Cocoa

1 teaspoon Ground Cinnamon

Melt in a pot then

Add 1 box of powdered sugar

1 Cup Pecans (optional)

After the cake cools, pour the icing over cake and spread it out.

I put it in the fridge for a while and take it out and cut into squares and put

in air tight containers back in fridge and then we eat it!


The post Chocolate Sheet Cake appeared first on Kelli's Kitchen.

Birthday Party Baked Potato Bar

$
0
0


Birthday Party Baked Potato Bar

Rocket just celebrated his 6th birthday. This year’s big birthday party was held at Top Girl’s new house. Rocket was excited for a visit from his great grandma and grandpa and of course for presents! And doesn’t every little boy love a Star Wars Theme for their party?

Top Girl had decided to put together a light lunch since her grandparents were traveling from across the state to join us. Since we would have some vegetarian guests, the spread would need to be accommodating. Top Girl tossed around all sorts of ideas, but she landed on a Baked Potato Bar and it was a hit. It was a snap to put together and gave our guests plenty of satisfying options for not much money.

Birthday Party Baked Potato Bar

Baked Potatoes

Ingredients

  • Russet Potatoes Washed
  • Salt
  • Butter
  • Foil

Birthday Party Baked Potato Bar

Directions

Preheat oven to 375 degrees.

Poke holes in each potato with a fork on all sides. On a square of foil sprinkle the potato with salt and place a pat of butter on one side of the potato and wrap it in the foil. Do this to each potato and place on a baking sheet. Bake the potatoes for about an hour (a little longer for larger potatoes). For the baked potato bar, place the baked potatoes in a heated crockpot to keep them warm.


Birthday Party Baked Potato Bar

Baked Potato Bar

Ingredients

  • Butter
  • Salt and Pepper
  • Shredded Cheese
  • Green Onions, diced
  • 1 Can of Chili, heated
  • Crispy Onions
  • Bacon Bits
  • Sour Cream
  • Ranch Dressing

Birthday Party Baked Potato Bar

Directions

Prepare and place all ingredients in serving dishes with serving utensils. All ingredients are optional. Add what you like and leave out what you don’t. Place them on a table and have everyone serve themselves, buffet style.

Birthday Party Baked Potato Bar

Other additions to your Baked Potato Bar might be a relish tray with olives and pickles, a cheese tray, and a Pasta Salad. We served The Ultimate Macaroni Salad.

Rocket had a blast at his birthday party and so did all of the Grandparents and great grandparents. We were all exhausted from putting on a big house party but everyone had a wonderful time.

Birthday Party Baked Potato Bar

While everyone else enjoyed the baked potatoes and macaroni salad, Rocket had his absolute favorite, chicken nuggets and chili. He set up his little table next to great grandpa so they could eat together.


Birthday Party Baked Potato Bar

Rocket’s big present, this year, is a trip to Great Wolf Lodge. It’s his absolute favorite place to go with his mom and dad. He was so excited!

The birthday party was a success and so was the baked potato bar. Next time you are looking to throw a party give this low effort spread a try.

Birthday Party Baked Potato Bar


The post Birthday Party Baked Potato Bar appeared first on Kelli's Kitchen.

Philly Cheese Steak Baked Sandwiches

$
0
0


Philly Cheese Steak Baked Sandwiches


Do you love cheese steak? Gooey cheese, peppers, onions, and thin sliced steak on roll is heavenly combination at our house. The smell of peppers and onions cooking wafts through the house and makes the guys perk up and wander into the kitchen to see, “What’s for Dinner?”

This Saturday Philly Cheese Steak Baked Sandwiches were on the menu. Top Girl was at the helm, and when her husband wandered into the kitchen, she put him right to work as her sous chef. Together, they cooked up a dynamite dinner.

These are wonderful sandwiches to serve a crowd watching sports. They can be individually wrapped and handed out to tailgaters, too!

These Philly Cheese Steak sandwiches even made a dynamite lunch the next day, reheated in the oven.

Add Nana’s Chow Chow for a real zing!

Philly Cheese Steak Baked Sandwiches

Ingredients

  • 5-6 Hoagie Rolls
  • 5-6 4oz servings of Philly style raw steak
  • Worstershire sauce
  • 2 tbsb of A-1 Steak sauce
  • 2-3 bell peppers, julienned
  • 1 large Onion, julienned
  • 3 tbsb of olive oil
  • sliced Provolone cheese
  • 2 tbsp Mayonnaise
  • 1/4 cup Butter, melted
  • Salt & Pepper to taste

Instructions

  • Preheat oven to 350°F

Philly Cheese Steak Baked Sandwiches

  • Sauté the peppers and onions in the olive oil until they are tender. Set aside.

Philly Cheese Steak Baked Sandwiches

  • Cook the steak meat in a skillet with the Worstershire and steak sauce, adding salt and pepper to taste.
  • Pour peppers and onions in the pan with the cooked meant and cook for a few minutes more.
  • While cooking the meat and veg, Separate the tops and bottoms of your rolls and place the bottoms in an 11″ x 7″ casserole dish lined with foil.

Philly Cheese Steak Baked Sandwiches

  • Prep the bread by spreading a thin layer of mayo on the tops and bottoms of the rolls.
  • When the meat, onions and peppers have finished cooking spread the mixture evenly over the bottom pieces of bread in the casserole dish.

Philly Cheese Steak Baked Sandwiches

  • Place a layer of provolone cheese on top.
  • Place the top pieces of bread on top of the cheese and then brush the tops of the bread the melted butter and pour the rest in the pan with the sandwiches.

Philly Cheese Steak Baked Sandwiches

  • Cover with foil and bake for 10 minutes, then remove foil and continue baking for another 10 minutes (or until cheese is melted).
  • Cut and serve hot.
  • Add Nana’s Chow Chow for a real zing!
  • *TIP: Wrap leftover sandwiches, individually, in foil.  Reheat in the oven at 350 for about 20 minutes.

Philly Cheese Steak Baked Sandwiches

Philly Cheese Steak Baked Sandwiches

The post Philly Cheese Steak Baked Sandwiches appeared first on Kelli's Kitchen.

Salsa Recipe for Canning

$
0
0

Salsa Recipe for Canning

What are you doing this fine Sunday?  I am making more of the Chow Chow I made a few weeks ago and my daughter asked me to make a salsa recipe for canning.  Something I have not done in several years.  I had everything I needed having gone to the Farmer’s Market yesterday and getting all the tomatoes one farmer had to offer!  It has been a tough year for tomatoes this year given our late freeze and then extremely hot and wet summer.  There were not enough for a nice tomato sandwich but small ones could be made into salad and salsa.  They smelled and tasted so good I was happy to make it.  Isn’t it pretty?

Salsa Recipe for Cannning

Yummy Homemade Salsa

Ingredients:

Fresh Salsa to Can Recipe

6 pounds of chopped tomatoes that have been cored but not peeled unless there is a bad spot.

5 Jalapenos finely chopped

3 Cups of chopped onions

10 cloves minced garlic

3 Bell peppers of various colors finely chopped

1 bunch chopped fresh parsley

Juice of 2 lemons

½ Cup white vinegar

2 teaspoons cumin

2 Tablespoons salt

1 teaspoon cayenne pepper (optional)

2 six-ounce cans of tomato paste

1 small can of tomato sauce

Up to ¼ cup sugar if you like a sweeter salsa – we do not use it.

Directions:

Combine everything into a large stock pot and bring to a simmer – simmering for 15 minutes.

Ladle into hot sterilized pint jars, leaving ¼ inch at top, put on flat tops and screw lids tightly.

Heat up water to boiling in deep stock pot or canning water bath pot.

Place in stock pot 3 at a time (do not overcrowd) and water bath for 15 minutes.

Take out and allow to cool in a draft free place.

Make sure lids are sealed.  If so, keep in pantry that is not too hot, for up to a year.

Refrigerate after opening.

I hope you enjoy this recipe — it is very delicious!

Salsa Recipe for Canning

Enjoy!

SALSA RECIPE FOR CANNING

The post Salsa Recipe for Canning appeared first on Kelli's Kitchen.

Chocolate Salted Caramel Pecan Oatmeal Bars

$
0
0
Chocolate Salted Caramel Pecan Oatmeal Bars

Look at that Ooey-Gooey Goodness!

Good Sunday Morning!  Can you guess why I have made these Ooey-Gooey decadent Chocolate Salted Caramel Pecan Oatmeal Bars along with other #Bakingbloggers this month?  Here’s Why:  Today is the last day of summer vacation for my grandson and me.  Tomorrow morning he begins school again and I am still his learning coach so busy days are ahead for us!  Somewhere in between the Math, Science, Social Studies, Language Arts, Technology, Art, Tae Kwon Do and Cub Scout Meetings there will be hungry tummies and these bars – in very small pieces – will satisfy even the most hangry 1st grader!

I will admit, they are rather rich and sweet, but in small slices taste just like what Heaven must taste like!

Chocolate Salted Caramel Pecan Oatmeal Bars

Just look at all the richness!

Let’s get on with the recipe — then, at the end check out all the other #Bakingbloggers who have put together some very tasty bars and brownie recipes.  Check them out — they are outstanding!

Ingredients:

1 1/2 Cups All Purpose Flours

1 1/2 Cups Rolled Oats (or pulse old-fashioned oats 4 times)

1 Cup of packed Brown Sugar

1 teaspoon Baking Powder

1/4 teaspoon Salt

1 3/4 Sticks Butter (14 Tablespoons)

2 Can (13.5 ounces each) Dulce De Leche (Nestle’ La Lechera is one brand)

1 Cup Chopped Pecans (or other nut that you like)

1 Tablespoon Kosher Salt

1 12 ounce bag of Chocolate Chips (I like using mini chips)

Directions:

Set the oven to 350F, choose a 9 x 9 pan spraying it with non stick spray and add foil or parchment to the bottom.

Mix up the flour, oats, sugar, salt and baking powder then cut in the butter until it is all crumbly.

Pat the “dough” into the bottom of the  9 x 9 pan.

Place in the oven and bake for about 35 minutes or until golden brown.

Make Sure it doesn’t burn though — pull out and let cool for 15 minutes.

Open up the cans of Le Lachera. Using a spatula spoon all into microwave safe bowl.

Microwave for about 1 minute or until it is pourable.  Mix with spatula and pour over the oatmeal base.

Spread evenly over top with an off set spatula then sprinkle the Kosher salt all over top of that.

Sprinkle the chopped pecans over top and finally the chocolate chips.

Put back into the oven for about 3-4 minutes, pull out and place some parchment paper on top of bars.

Press down lightly so the pecans and chips sink into the caramel.

Cover with foil or plastic wrap and place in fridge for about 4 hours then slice into small pieces.

Store in an air tight container.

These are a bit messy as you can see but we put our squares on a plate and put in the microwave for about 30 seconds and eat them warm…………they are delicious!  Enjoy!  Now check out the other #bakingbloggers below!

Chocolate Salted Caramel Pecan Oatmeal Bars


Chocolate Salted Caramel Pecan Oatmeal Bars

The post Chocolate Salted Caramel Pecan Oatmeal Bars appeared first on Kelli's Kitchen.

Queso Monkey Bread

$
0
0
Queso Monkey Bread

Perfect for football season!

Are you ready for Football season?  Tailgating?  Feasting? What about holiday parties coming up soon?  Yep — me too!  I love cooler weather and snacking.  This Queso Monkey Bread with Chorizo (or spiced up hamburger meat) fits the bill.  I always give credit when credit is due but honestly, I had to remake this recipe to make it edible while wasting lots of food so I am not going to give credit to the TV Show that first showed me this recipe and then published on their website — all wrong.  Directions and the  baking time was way off too.  Follow my recipe and you will have a great appetizer  or meal.  Another plus is that you can make part of it one day and finish on party day.

Ingredients:

A little olive oil

1/2 pound of fresh chorizo, hot Italian sausage or hamburger meat

1 White Onion, finely chopped

2 Red Bell Peppers, finely chopped

2 Jalapeno Peppers, finely chopped

6 Cloves Garlic, finely chopped

2 Cups Heavy Cream

1 pound Processed American Cheese, grated — like Velveeta

1 pound Pepper Jack Cheese, grated

1/2 Stick Unsalted Butter — cut into very small pieces

1 Package frozen Yeast Rolls — Like Rhodes Rolls, thawed

Salt and Pepper to taste


Directions:

Finely chopped up the veggies like this:

Queso Monkey Bread

Pretty Colors

In a pan, put in a little olive oil then whatever meat you chose and break it up until completely cooked.  Set aside.  Add a bit more olive oil and put in the veggies and cook until soft.

Add to the veggies, the cream and stir to a simmer.

Add in the cheese and stir continuously until it is all creamy and smooth.  Look at this scrumptiousness!

Queso Monkey Bread

Best Cheese Dip EVER!

Divide cheese mixture evenly into 2 bowls.  Add your cooked meat to one.  Cover both and place in fridge for at least 4 hours and best to do over night.

4 hours later or the next day, preheat the oven to 350F.

Lay bag of rolls out to thaw.

After thawed, lay out a sheet of parchment paper because the roll dough will be sticky.

Take a roll into your hand and gently pull until it grows in size a bit.

Using a cookie scoop, scoop out some of the congealed meat cheese mixture and then fold over rolling into a pinched off ball like this:

Queso Monkey Bread

Easy Peasy!

See how that made 36?  Originally the recipe was for 24 rolls and there’s way too much left over!  I made sure that this recipe IS for 24 rolls.

Place in ONE SINGLE LAYER in a Bundt Pan then sprinkle cut butter on top.  However, it looks like this if you followed the original recipe — and everything underneath was RAW!

Queso Monkey Bread

It looks like a bread volcano!

I recommend that you put single layers into cast iron skillets or even a 9 x 13 Pyrex dish  looking something like this:

Queso Monkey Bread

Not very neat but wasn’t expecting to have to recook the recipe.

Microwave the other bowl of cheese dip for about 45 seconds stir and continue at 30 second intervals until creamy and smooth.

Serve the rolls either in the pan or turn it out onto another dish and serve to be served with the cheese dip.

You will enjoy!!


Queso Monkey Bread

Mmmmm…. delicious!

Queso Monkey Bread

The post Queso Monkey Bread appeared first on Kelli's Kitchen.


Salami Pinwheels for Any Potluck

$
0
0

On just about any potluck spread, where I’m from, you will find cream cheese pinwheels. They’re one of my potluck favorites, and everyone else’s, too. I like these salami pinwheels even better because there is no flour tortilla involved. I love tortillas but they get kind of soggy in pinwheels. The salami in this recipe really holds up. These are perfect for your New Year’s Eve finger food spread or any potluck.


Salami Pinwheels

  • 1 lb. Genoa deli-style salami (sliced thin)
  • 2 8 oz. package cream cheese, room temperature
  • 1 red bell pepper, sliced thin
  • 1 tbsp Mayonnaise
  • ¼ cup chopped black olives

Directions

  • Place a piece of plastic wrap on a clean surface (I used a cookie sheet).

Salami Pinwheels for Any Potluck

  • Lay out the salami on the plastic wrap overlapping.
  • Mix the cream cheese, mayonnaise, and black olives in a bowl.
  • Spread the cream cheese mixture over the salami.Salami Pinwheels for Any Potluck
  • Lay the sliced red bell peppers on top of the cream cheese and press, lightly.
  • On the long side, lift the edge of the plastic wrap and bend inward. Use the plastic wrap to help you roll the salami tightly.

Salami Pinwheels for Any Potluck

  • When it’s rolled tightly, secure the plastic and leave it on the cookie sheet.
  • Refrigerate at least 4-6 hours or overnight. (I recommend overnight)
  • Cut the roll-ups slices thin.
  • Serve alone or with crackers.

Salami Pinwheels for Any Potluck


Mine came out kind of rectangular and less circular but it tastes just as good. You can use half the cream cheese and spread it much thinner, if you like. I like mine just fine. My family did, too.

Salami Pinwheels

  • 1 lb. Genoa deli-style salami (sliced thin)
  • 2 8 oz. package cream cheese (room temperature)
  • 1 red bell pepper (sliced thin)
  • 1 tbsp Mayonnaise
  • ¼ cup chopped black olives
  1. Place a piece of plastic wrap on a clean surface (I used a cookie sheet).
  2. Lay out the salami on the plastic wrap overlapping.
  3. Mix the cream cheese, mayonnaise, and black olives in a bowl.
  4. Spread the cream cheese mixture over the salami.
  5. Lay the sliced red bell peppers on top of the cream cheese and press, lightly.
  6. On the long side, lift the edge of the plastic wrap and bend inward. Use the plastic wrap to help you roll the salami tightly.
  7. When it’s rolled tightly, secure the plastic and leave it on the cookie sheet.
  8. Refrigerate at least 4-6 hours or overnight. (I recommend overnight)
  9. Cut the roll-ups slices thin.
  10. 10. Serve alone or with crackers.

Find me on Weekend Potluck!


The post Salami Pinwheels for Any Potluck appeared first on Kelli's Kitchen.

Crab Rangoon Bombs

$
0
0

Crab Rangoon Bombs

Making Crab Rangoon at our house is a family affair. It’s David’s specialty (using his mom’s recipe). Somehow, we always end up with too much filling and not enough wrappers. You can freeze the filling, of course, but it’s more fun to make Crab Rangoon Bombs!

David came up with the idea of making these deep-fried delights with some leftover filling, before a family party. They were so popular they have become a regular addition to his repertoire.

You can, of course, make our Killer Crab Rangoon and then make some crab bombs with the extra filling or you can just go straight to making them as your main event. These Crab Rangoon Bombs are the real deal with plenty of crab and gooey cheese and a crunchy panko crust all the way around.

Crab Rangoon Bombs

Crab Rangoon Bombs

Crab Rangoon Bombs
Print

Crab Rangoon Bombs

Ingredients

  • 1 Pkg Cream Cheese
  • 2 cups Shredded Mozzarella cheese
  • 2 cans or fresh lump or white meat crab drained.
  • 1 cup Imitation crab flaked
  • 5 Green onions chopped
  • Salt to taste
  • Panko Breadcrumbs
  • 2 eggs beaten
  • Vegetable Oil

Instructions

  • In a bowl, mix all ingredients (except the panko Breadcrumbs, Eggs and oil). Cover the bowl with lid and let sit in fridge for half an hour or until you are ready to use.
  • When you are ready to cook, put your beaten egg in one bowl and then place the panko breadcrumbs in a separate bowl.
  • Using the crab mixture, make about half dollar size balls.
  • Dip the balls in the egg and roll around in the panko until completely covered.
  • Prepare all bombs before heating oil.
  • In a frying pan with oil up to the midpoint, bring oil to 350 F. Fry the bombs until the panko is golden and crispy.
  • Place cooked Crab Rangoon Bombs on a paper towel to drain oil.


Crab Rangoon Bombs


More Crab Love

Tip-Top Crab Cakes

Mac and Cheese with Crab and a Giveaway


Crab Stuffed Corn Muffins for #MuffinMonday


Crab Stuffed Mushrooms

The post Crab Rangoon Bombs appeared first on Kelli's Kitchen.


Latest Images